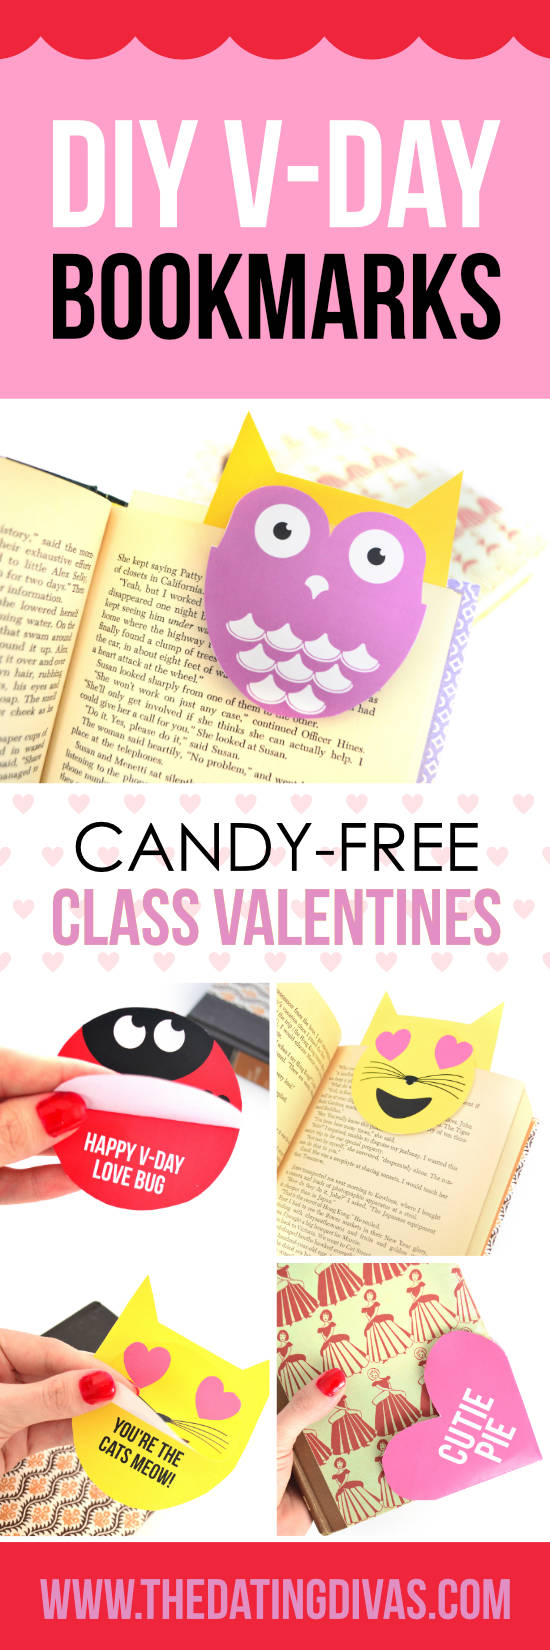
Disclaimer: This post contains affiliate links. To learn more about ’em, click here. The most amazing Carisa, of Messes to Memories, brought our vision to life with these adorable DIY bookmarks. The printable comes with 6 different options from which your kiddos can choose.
The first one is so much fun and helps teach a new skill: Origami!
How to Make DIY Origami Bookmarks
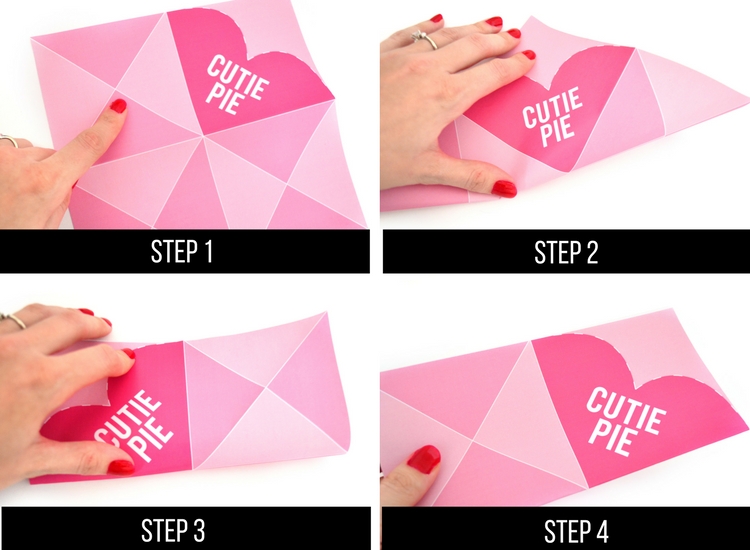
We thought you might need a little help figuring out the steps so we have a picture and word tutorial for you (and even though we promise it isn’t TOO complicated, you might want to pin it to save these instructions when you need them most). Helpful hint: Use some good quality cardstock to help these keep their shape and last longer.
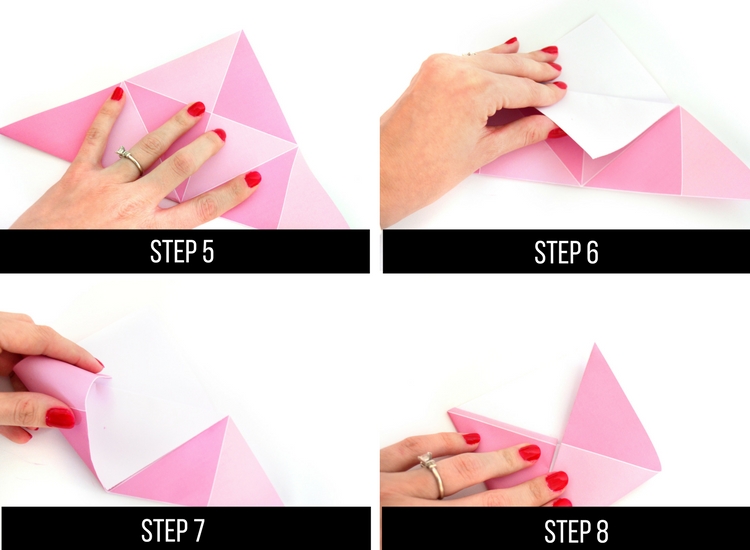
Lay the origami, printed side up, with the heart pointing away from you.
Fold the bottom part under so you have a triangle with the heart at the top/center.
Unfold the triangle and fold the line that runs along the LEFT side of the heart.
Unfold and now fold the line that runs along the RIGHT side of the heart.
Unfold and lay the paper printed side down. Fold the bottom portion up so you have a pink triangle – no heart. 6. Fold the top portion of the pink triangle down so the point meets the bottom fold. This will create a white diamond shape.
Take the left corner of the triangle and fold it up INTO the pocket that the white diamond creates.
Do the same with the right corner of the triangle.
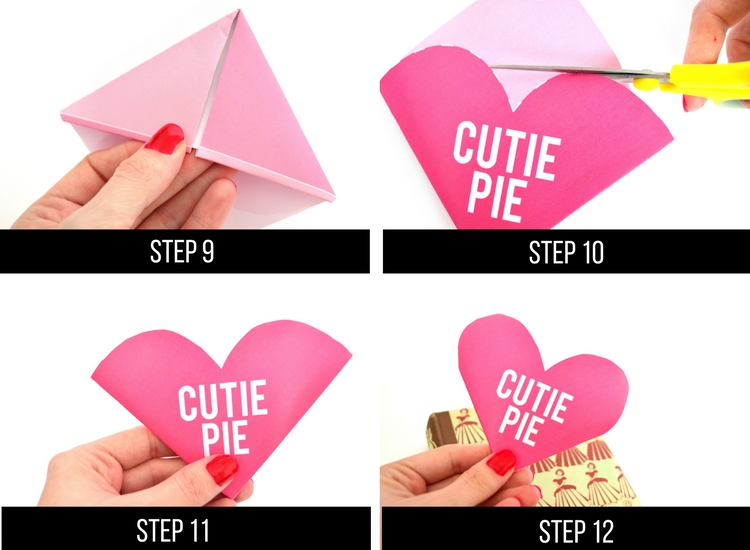
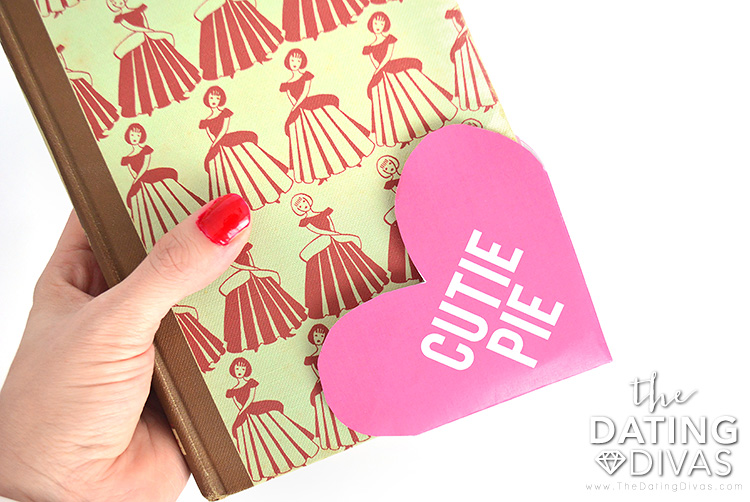
9. This will leave you with a pocket-ed square that features 3 pink triangles and 1 white. 10. Turn it around and cut the dotted line. 11. Take your wonky heart and give it a trim to make it more heart-shaped 12. Give with LOVE! {These bookmarks slip over the bottom of book pages like a pocket} The origami heart bookmarks come in pink and green. Print however many you need and get folding!
More DIY Bookmarks
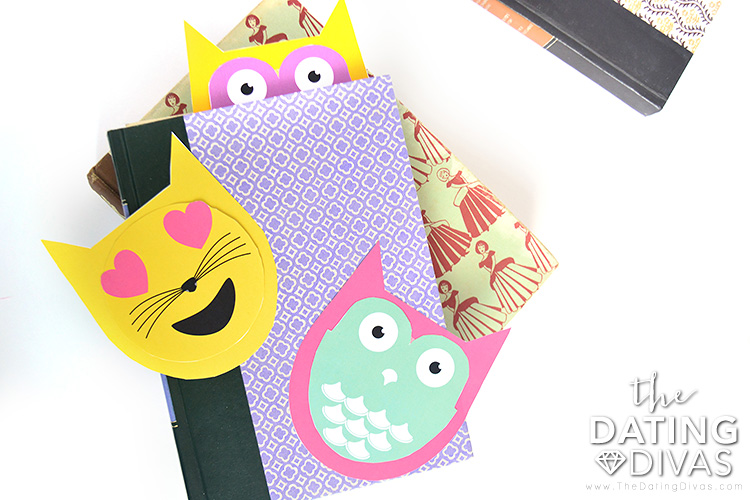
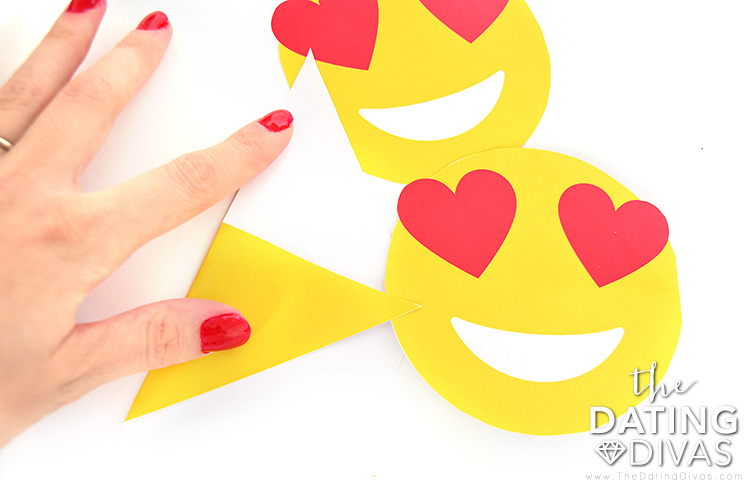
If a simpler origami is more your speed try our heart-eye emoji DIY V-Day Bookmarks. Emoji bookmarks!?! How sweet is that? These DIY Bookmarks are so easy and kids will just love them! Cut out the shape, fold each triangle down to form a pocket {corner to corner}, and glue an emoji on the front! All the heart-eyes!!
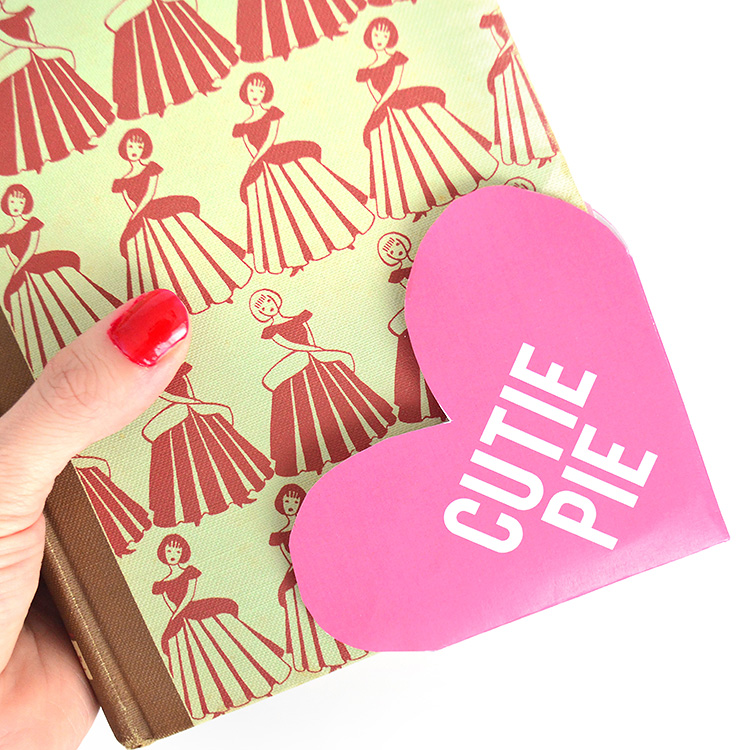
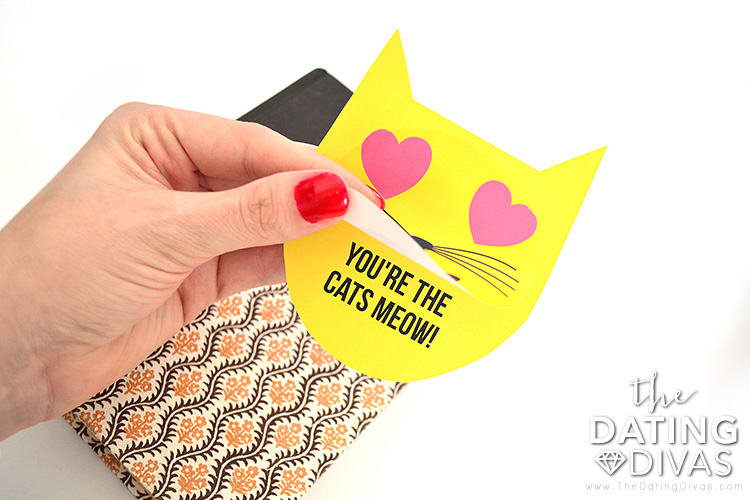
Next up is a similar look, but for the cat lovers out there! This is a simple cut and glue process. The cat comes in 2 parts, the front and the back. The back portion has the little valentine on it. Just run a line of glue or adhesive along the top of the top portion. These bookmarks sit over the page that needs saving.
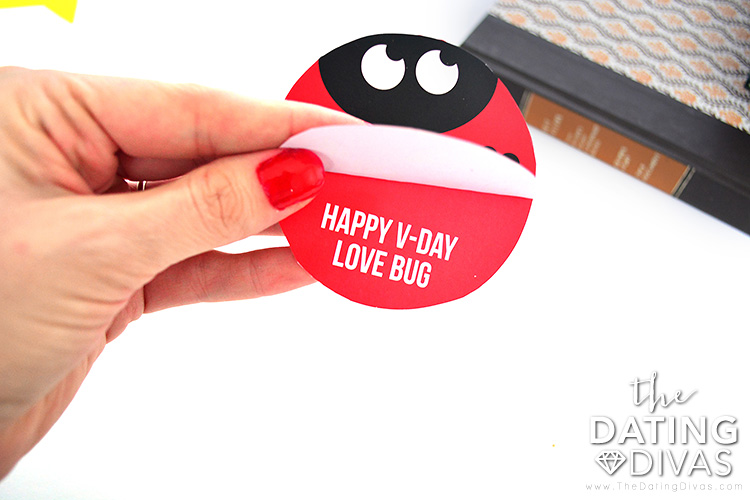
We also have a ladybug version for all the little love bugs!
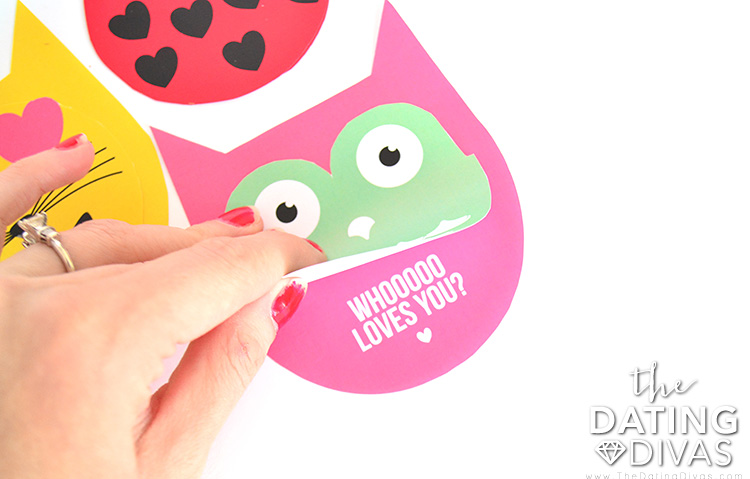
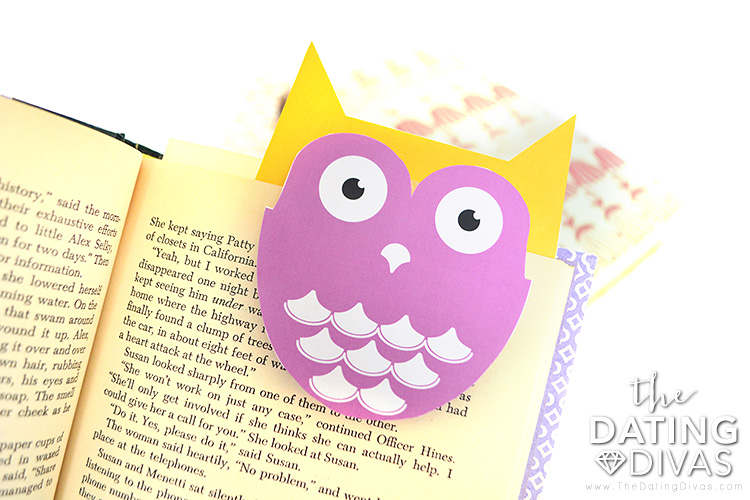
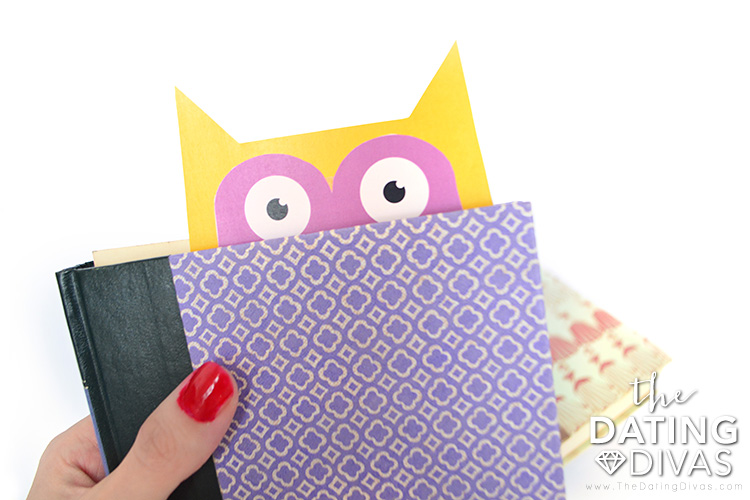
Or 2 different owl versions.
You can mix and match the 4 different colors to customize your valentines.
We may be a little biased, but these are the CUTEST DIY bookmarks we’ve ever seen AND they spread love. Win-Win! And for a Win-Win-Win, try saving them on Pinterest so you can use them again next year!
SaveSave